Monday, October 22, 2012

Oh Rosie

Fall has come, rain has started and the pig pen has turned into a mud pit. I built a pen for the pigs i the bar, but it really wasn't enough room for both pigs to spend all winter. Rosie was making it clear if I did't fix up her digs, she would take matters into her ow hands (cloven hooves?). Feed costs are also a problem as the pigs are not yet on pasture. My fiance prefers to overfeed animals rather than underfeed, Mr.Pig was happy to eat whatever came his way at a cost of $35 a week. Aint happening.

On Wednesday we said goodbye to Mr.Pig who has moved on to Farmer Gord's. He has 3 sows and 30 acres. Its a better space for Mr.Pig. Of course, it was a adventure load Mr.Pig. I had to feed my piggies a little that day because Rosie was in a mood. She kept trying to tear open the fence, so I feed them in hopes of placating her...but them mr.pig wasn't as hungry as he should have been. So Gord had a family emergency and shows up a 9 pm. Luckily I had hooked up electricty to the barn...but it was just a single lightbulb. Everywhere else was pitch black. I untied some of the cattle panels to let out Mr.Pig and Rosie decided to make a break for it, them Mr.pig decided to take a hike too. So we chased the pigs around in the dark, got them back in the barn then focused on mr.pig. once we had him infront of the trailer he went in.

So Rosie has lots of room and food to herself now, all is good, right?

no. Wrong. I suppose I should have taken pictures as proof but believe me: she tore her pen to shreds and tried to run away. I sat down at my bench finally and started working on a new ring when Shawn looked out to see Rosie escaping into the neighbors Our permimeter fence is only a fraction complete and Rosie would not be contained any longer. We had to discuss the future of Rosie as we don't know if she is pregnant or not. She *might* be, but the again has always had trouble taking....I was fit to be tied and ready to turn her into dinner, however Shawn did not agree. As you can see our little flow chart:

You see the corner of the crossed out one: "dead pet." Oh Shawn, you might want to stick with being a vegetable farmer. So Rosie lives. We did call a vet to try and get an ultrasound to see if she is preggers, but alas the vets weren't able to sedate her and we couldn't. THAT was a horrible experience chasing her with giant needles and trying to stab and drug her up. Was she ever mad.

Throughout the day I babysat her and kept her from running away while Shawn came up with a plan...his plan eventually became "I don't want an ugly, crappy temporary fence next to my house, so lets build a rubbish pile that is too tall for her to climb!" So thats what we did: we cut down trees and piled up brambles all the way across the open fence line and I got the section of electric fence powered up. I personally am not sure it looks any better than a janky fence but it cost $0 and we did it in 2 days, so thats great. Did it work? No. The next day Rosie climbed right over the logs.


.....


 The brush pile was meant to be a mostly visual barrier, but it wasn't quite enough. So Shawn put up a line of temporary electric line in front of the brush aaaaaaand tada! it worked! Rosie is now free-range as are the sheep. I got her a new bale of hay for her bed so she is sure to come home at night.
Do YOU see the sly look in her eye?


I really hope this girl is pregnant. With all we have been through with her we need some payback. And adorable babies. Oh yes, and since she IS a pet offically she has a twitter account. Follow her!

Now maybe I can get back to my bench?

Friday, October 12, 2012

Pouring the Foundation

Winter is coming up fast and our well needs a house! My mother and I took it upon ourselves to finally start the project for a small 4x4 slab. We dug out the space and when my honey came home he was like, "Uh, no ladies. Thats not how its going to be done." While he nixed our small foundation for a bigger shed that could function as a tool shed or possibly root cellar, we did get the ball rolling. ;)

What we ended up with was a 8x8 foot foundation and footing. He did the framing Wit the help of my mother. Next was the fun part NONE of use had ever done: pouring from a truck. Oh yes, and since lack of time/good weather/money we poured the footings and the slab as the same time for an extra challange.
Discussing the logistics

The Foreman is on the job.

Evening out the concrete

Still level!

This part of the job is done!

Taking off the forms revealed a few air pockets were missed, but overall a decent job!
So next we need to build the actual pump house and then our well will be set for winter. Gotta hurry, though: cold weather in almost here. We had our first rain this morning and first frost last week. After that fixing up the animals better for the rain.

Tuesday, September 4, 2012

Ash

Meet Ash, an East Fresian sheep. She is a 8 month old dairy sheep.


The cats arn't to sure of what to make of this newcomer
 I agreed to buy her hoping to cross her with my Jacob sheep for a lower maintenance dairy sheep. Her mom made about half a gallon a milking, which would make almost a gallon a day! The day before I received her tragedy struck: her small flock was attacked by coyotes and only Ash and a goat survived. Then the goat turned on Ash and started beating up on her! When she came to my place she was really scared and sad. I wasn't quite ready for her so her first few days she was on a leash.

Now she has a pen around a plum tree where she can see everyone. We haven't gotten one of our other sheep from our old farm yet (they are basically wild sheep this summer), so she is still a bit lonely. But this has given me a chance to get her to bond with me and learn to trust us.


 I decided to try giving her a mirror to see if that would help her feel less lonely. Well, she doesn't have much experience with mirrors, right? so I put a mirror up for her and she saw a sheep! yaaay! then she looked around the mirror, and no sheep. sad. Look in the mirror, magic sheep is back!  she carefully headbutted it a few times not totally convinced of it....Ash spent a few minutes trying to figure out and talk to the magic 2 dimensional sheep, then decided it was ok....ish. She is certainly calmer seeing another sheep face, but its not the same as a real sheep. Still when she goes into her pen in the morning she runs over to look at magic sheep (or maybe shes figured it out and she is just checking herself out.)

Ash is a real sweetheart and seems pretty sharp. Whoever said sheep and stupid didn't get to actually know them, yes, they flock together, but they really do think. She is already learning some basic commands with clicker training.

 Since she is polled (no horns) i didn't feel comfortable taking her to the old farm in Oregon City and leaving her in a new herd of horned sheep. Sounds like a great way for her to get hazed to death. So the plan is to pick someone from the flock of Jacobs up and introduce her to one member of the herd, then when we get the fences up the rest of the herd can come up and since one of the jacobs "knows" her, she will have an easier time joining the the rest of the sheep.

Thursday, August 23, 2012

Pigs!

We got the pigs moved in a few weeks ago and boy was doing that an adventure. Getting Rosie loaded involved a half days work and many trial and error attempts.

First we tried asking her to go in with food, only to have the trailer fall over and scare her. apperently the small trailer needed a counterbalance for the 500 lb pig climbing in. ok, fair enough, makes sense. After that she was afraid of the thing. Next we tried forcing her in with cattle panel (as suggested in a pig book). she just stuck her nose in the cattle panel and tossed it (and me) aside. Or busted through a wall, or the trailer, or whatever she thought would make us leave her alone. Finally we built a chute (experienced pig farmers know thats what you need in the first place) got her in with food. Still, she wasn't inclined to go in the trailer so I got the hose and sprayed her. Actually, that was a wonderful humane was to get her to move: it was hot, so it wasn't terrible for her to get wet...just annoying enough she moved away from the water. So i sprayed her face when she tried to nose out of the chute which got her to stop trying to break out and then sprayed her backside on up into the trailer. It worked! She went in and stayed calm (thank goodness because she could have busted through that rickety trailer if she wanted).
The beautiful lady using a natural sleepmask

Yes, Rosie is a big girl.
When we got to the farm the neighbours came out to watch us unload. Rosie didn't turn around, no she decided to back out of the trailer which worked for a few steps.....until she stepped off the ramp, tripped, fell on her butt and rolled out. A rather graceless exit, if I may say so. She was okay, though. The neighbor exclaimed, "Thats a pig?! I thought a baby hippo was coming out!"


The next night we went to pick up her new boyfriend. Well, THAT was an adventure coming back up a twisted, steep mountain side gravel road with a 500 lb boar we didn't know in a rickey trailer in a manual S-10 Chevy without 2nd gear. Lets just leave it at that. Oh the adventures of moving farm animals without money.
 Anyway, the boars name is Mr.Pig and he is Gloucestershire Old Spot. His breed was designed for running under orchards and picking up fruit that fell on the ground before it rotted and attracted insects. His former owner was chopping down trees and turning it into pasture and used Mr.Pig to tear up the roots of the trees and undergrowth. I think he said they cleared 2 acres that way.

While I had hopped to use Mr.Pig in a similar way and run him under the orchard that we don't have planted yet I'm not sure how long we can keep him and his appetite. But we have two goals with him: a friend for Rosie and to breed Rosie.

Oh yes, did I mention the other thing I liked about his breed? Well, as I understand it modern pig breeds don't necessarily know how to have sex. Infact, the farmer either has to help insert the boars penis into the sow OR just skip the boar and use artificial insemination which means the farmer has to track the sows ovulation cycle and administer 2-3 doses of semen when she is in heat. Personally, I love Rosie but thats a little too friendly for me. I want to be the matchmaker for my animals, but i don't want to be involved in their sex lives.

However, these modernbreeds are MODERN, farmers once upon a time did not have AI, nor the time to stand around and help their pigs breed. The Old Spot breed can breed without human help. Mr.Pig is proven aka. he has made babies already: his balls work and he knows how to use them.
Who's got big balls? I've got big balls!

His breed creates alot of bacon. The fellow we got him from recently slaughtered an old spot that gave him 75 POUNDS of bacon, plus hams. Rosies breed (Yorkshire) can be made into bacon, but overall the meat is very white. Instead it makes good roasts, tenderloins, and other white cuts. The fellow we got Mr.Pig from is very excited about crossing York with Old Spot as he says its the best possible mix of breeds. We shall see.

Rosie has mixed feelings about Mr.Pig. He's kinda a dick at feeding time as he pushes her away from all the feed troughs, but he is another pig to hang out with. I remember one day I fed him and he was in the corner chowing down on the slop I gave him. Food was literally flying everywhere and his ears where bouncing everywhere. then at the other side of the pen I had food for Rosie. She ate slowly, calmly, happliy chewing her food, looking around, took another bite walked over to the bathroom, went pee...came back for somemore food...went for some water...lalalala....and all the while in the other corner food is flying everywhere as Mr.Pig was choking it down fast as he could. What can I say? Rosie is a lady with manners, Mr.Pigs a bit of a country bumpkin.

Rosie has cycled, though. Her first few days with mr.pig she was not thrilled. I went to visit them one day and he was asking for backscratches from me, and she was nosing around his balls. At one point he was ignoring her, she stuck her nose between his legs and went *womp!* right into his balls. He went crosseyed, flew a foot in the air and let out a squeal that said it feels the same for all guys.  Next day she showed signs on her backend of being in heat. Hopefully he preformed his duty and she took. We may have pigglets in the couple months. Lets hope!

One last thing. The pen they are in is temporary. We want to build a paddock system and run them through the fields and forest rotating the pasture giving it a chance to rest. In some cases we will use the pigs on a very limited space to tear out weeds and rototill, then move them off and plant on the cleared and fertilized ground. If we can time this right we can really make the whole property healthier...if not we can mess things up. Compare the pen from when we first built it to 3 weeks later:

There is alot of bare ground they have opened up and their "fertilizer" is all the the corner and easily spreadable. It is defiantly time to move them before the ground gets too bare and compacted, but its pretty amazing to see how they can clear land so quickly. I am going to try and figure out a way to get up easily moveable fences that keeps Rosie in (thats the key part. she walks right through electric fences, tears through cattle panel is she chooses) and try and use them to clear a path through the woods. Well, its worth a try at least.

That was alot of pig info. I'm still learning about pigs myself. If you have questions or comments feel free to ask and I'll try to answer. More pig stories soon enough.

Farm life

Hello fair and patient friends! I am still taking a break from jewelry as I am now working overtime and trying to get my farm going.

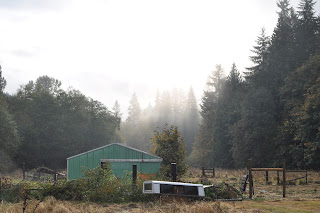
What do I mean I am trying to get it going? Well, I got a new place to live! wee! Its up north of Portland nestled in a valley with a lovely stream and forested hillside. Its dreamy.


The cabin was in the middle of being fixed up when the owner passed on, so there is lots of work to be done on the inside.

 But the kitchen is pretty nice with a whole wall of cabinets, and island and bay window to grow herbs in during the winter. Behind the kitchen is a decently sized mudroom/laundry room I hope to turn into my own jewelry studio.
 It has taken some time to get the animals up. We officially have the pigs moved in and the cats. My dog isn't quite ready to live up there: shes not ready to live with 4 cats running around. Hopefully soon I can get my work schedule fixed up and I can move in full time. Right now I am straddling between living at my old house (7 min away from work) and the farm (45 min away from work).
And the cats agree: its a nice place to take a nap.

Wednesday, July 18, 2012

Gettin' Goin'

 Life has been a bit busy lately. I went to Mexico for a week, got back and found my co-worker had to take sick leave and got bumped up to full time, crashed my car a month ago and was carless a few weeks. Not to mention this whole starting a farm thing. yeah. Suffice to say I haven't TOUCHED my bench in over a month.

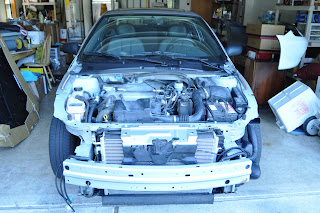
Techincally my car was a total...but it was a front end collision that crushed the hood, lights and a fender then bent back my radiator. But the engine was fine and its been a good car with only 70,000 miles on it. So rather than take the money and run the risk of buying a lemon I decided to have the mechanic do the mechanics (and fix a few safety things i should have done a looong time ago) and I did the body work.

I drove my car home looking like this (turned alot of heads!)
My mom and I picked up a few parts from U-Pull it (oh the men there were hilarious. Had some guy in the parking lot hitting on me trying to the the "job" of doing my bodywork. "Don't you think you ladies could get someone who can do it better?" no, sir, no. i think I can do this just fine.) and a new hood and lights.

 Had to drill a few new holes to put on the fenders.

 Yeah mom! Drill that sucker!
 Remember I mentioned the new hood? no one told us it didn't have a latch on it. Which is a really hard part to find. At that, no one told us it was not a "hood latch" or a "hook" but a striker. So for the first few days until we finally got the part I drove around like this:


Yeah, well, that worked at low speeds. I'm not going to say what happened when I got hit by a gust of wind going slightly faster than I should have. ....

Finally got the "striker" and part 1 of car repair is done. I need to fix the replacement bumper we got and then paint everything, but I can do basic auto body now! There's a dent in the side I am going to tackle soon.

This is reason #1 i've had no time for jewelry.

Tuesday, June 19, 2012

How To: Basic Pavé

Basic Triangle Pave

I finally learned pave, yay! or at least this basic pattern. The pattern will change depending on the shape and there is a whole theory behind how to arrange the prong pattern which i haven't yet been able to comprehend, so lets just stick with the simple triangle, eh?

First set your stones table down on the piece almost touching, then mark their centers. Drill your starter holes
 These came out a little close, so I put the stones in to see it would work, yeah, it will.

 See how the stones are almost, nearly touching? That is what you want.


 So now mark one side as top, and drill out the seat for the stone at the top. This will be your guide stone. make sure to drill deep enough when you put your stone it its table is flush (or just slightly lower) with the metal.
 Drill your next seat a hairs width from the other seat. You want the smallest gap you can make between the stones without them actually touching. That is the hard part. Sometimes i drill close enough I have a sliver of metal that moves between the hole depending on which side i drill: this is a good sign to me.
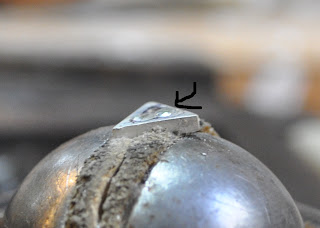
 Next drill out your third seat now only a hairs width from both of the other stones. That was hard, eh? Now take your tiny oval graver and cut out any wall material between your stones, be sure to leave the stub in the middle of the three stones. You can see what i mean by expanding the picture below: I tried to mark the metal I wanted to keep with a sharpie. You may need to touch up your seats again with your  drill to get out any flashing.

 Now when you fit your stones in they should all be almost touching, tables flush with the surface and sitting straight. Not too much to ask.
 as you can see in this picture one of my stones is sitting up too high so i had to pop it out and drill the hole a little deeper.
 Once you get everything even its time to start setting. Take your knife graver now, put the tip into the metal at a 30 degree angle, then lift your graver up to a 70 degree angle  and push into the metal wiggling side to side. this will make the metal mushroom over the stone and should only leave a dent in the metal. This is the beginning of your bead.  This alone should set your stone, after you have all the corners done your stones should be set and the rest is cosmetic. In this piece there are 6 beads you want to create: the 3 corners, and the 3 pieces on metal between the stones.
 Once you have created 6 beads now you need to set them free. Start with your knife graver and cut a little V shape around your bead. This should leave you with enough metal for a round bead prong. You can sort of see in the picture below how I started cutting away the metal. Do that with all the beads, then take a beading tool and burnish your little metal nubs into actual beads. The arrows below show which direction your prongs should go. Each stone gets a single prong in the corner, and the metal between the stones create shared prongs. Using your round gravers face you can tilt that center bead to hold the two lower stones, or if you have enough metal you can  create a shared prong between all three stones.
 Clean up the edges using a flat graver creating a bright cut around the edges. Add milligrain if you want, polish it up and there you go! A basic pavé!

Saturday, June 16, 2012

Shear ye! Shear ye!

 Yes friends, its that time of year. Infact, its a little late to be doing this. Finally setting out to shear the sheep. This was the first time I ever did it and it was fun. I tried both electric shears and hand shears and found I prefered the hand shears.

 I watched lots of videos on youtube that made it look easy...but it wasn't so much. Not terrible, but i certainly was not as fast. But there ya go: Sparkles whole fleece all cut off by me with the help of my family in holding her down. I finally got into the rhythm and up to speed the last part of the fleece.
 Then there was John. Most sheep pass out when sat on their butts...him? not so much. Like Wilda, hes not inclined to be docile. It took Shawn a few minutes of wrestling to even get the sheep on the ground finally resorting to out and out tackling and rolling him over.

This time is was my sisters chance to cut. Gratious me, did I have a hard time not intervening.....she was very careful not to cut them and went slow. really. slow. painfully slow. all the while John was gathering up his strength for the next escape attempt. He needed more speed in his shearing.

 Part of the time he was in a leglock between Shawns legs, and other times 3 of us held him down while someone sheared. Once or twice I had to throw my body over him to hold him down. His horns made it difficult to tuck his head in close enough for him to go in his sheepy trance.
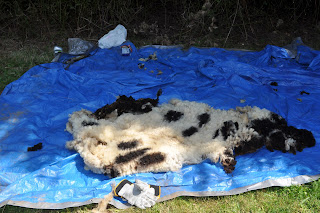
 Not the most perfect fleece as he tried to escape and tore it, buts its mostly in one piece.
That there is the naked sheep. Compare to the picture above with his fleece. He is a mighty skinny boy now.

Tuesday, May 8, 2012

Fabricating a Bright Cut Pendant

Hello there! Been a while, eh? I've been very busy at my bench. One of my recent projects was this fabricated opal pendant. I started with 12 gauge silver sheet soldered to a back plate (20 gauge) and half bezel. I had to make sure my silver was thicker than the stones I was trying to set. Once I was done soldering I cut it out and got this:


 No holes for stones, though. Next I placed the stones and drilled starter holes for them. I'm testing the piece out to see if i've got thing spaced well.


Next I open up the holes with a flame bur then a setting bur to create a seat. Most my seats are a tad small so I use a knife graver to open it up enough to fit a stone.

 After getting everyone to fit I take my graver tip press it into the metal then tilt the tip up: I do not cut, I simply wedge metal over the stones. This is the beginning of the bead process.
 Next I cut a little V behind each bead to "release it." They are ugly at this point, but once I polish and shaped them with a beading tool we have pretty little beads


 Once all beads are finished I am now bead set. I then take my flat graver and cut behind the beads to clean things up, remove stray marks, and create nice angled surfaces to reflect extra light. This is bright cutting and together it is called "bright set." There are many variations of bright set but the main idea is the setting surface has been angled so that it reflects more light creating a "brighter" look.


The opal setting was quite tight already, but just to be extra safe since it was just a half bezel I epoxied AND  set metal over the stone. I pretty happy with the finished product, though the bright setting could be a little cleaner. Also: don't bright set periot. Just. Don't.