Showing posts with label bezel set. Show all posts

Tuesday, May 8, 2012

Fabricating a Bright Cut Pendant

Hello there! Been a while, eh? I've been very busy at my bench. One of my recent projects was this fabricated opal pendant. I started with 12 gauge silver sheet soldered to a back plate (20 gauge) and half bezel. I had to make sure my silver was thicker than the stones I was trying to set. Once I was done soldering I cut it out and got this:


 No holes for stones, though. Next I placed the stones and drilled starter holes for them. I'm testing the piece out to see if i've got thing spaced well.


Next I open up the holes with a flame bur then a setting bur to create a seat. Most my seats are a tad small so I use a knife graver to open it up enough to fit a stone.

 After getting everyone to fit I take my graver tip press it into the metal then tilt the tip up: I do not cut, I simply wedge metal over the stones. This is the beginning of the bead process.
 Next I cut a little V behind each bead to "release it." They are ugly at this point, but once I polish and shaped them with a beading tool we have pretty little beads


 Once all beads are finished I am now bead set. I then take my flat graver and cut behind the beads to clean things up, remove stray marks, and create nice angled surfaces to reflect extra light. This is bright cutting and together it is called "bright set." There are many variations of bright set but the main idea is the setting surface has been angled so that it reflects more light creating a "brighter" look.


The opal setting was quite tight already, but just to be extra safe since it was just a half bezel I epoxied AND  set metal over the stone. I pretty happy with the finished product, though the bright setting could be a little cleaner. Also: don't bright set periot. Just. Don't.



Wednesday, October 12, 2011

How To: Open a Bezel

Has it ever happened to you that a customer wants you to change the stone in a setting, but wants both parts saved? Or maybe while you finish setting your stone you break off part of the piece. Never happens, right? Well, lets say it DOES happen one day. How are you going to get your stone out safely?

Let me show you my little trick. I'm going to take this boring piece and pull it apart.

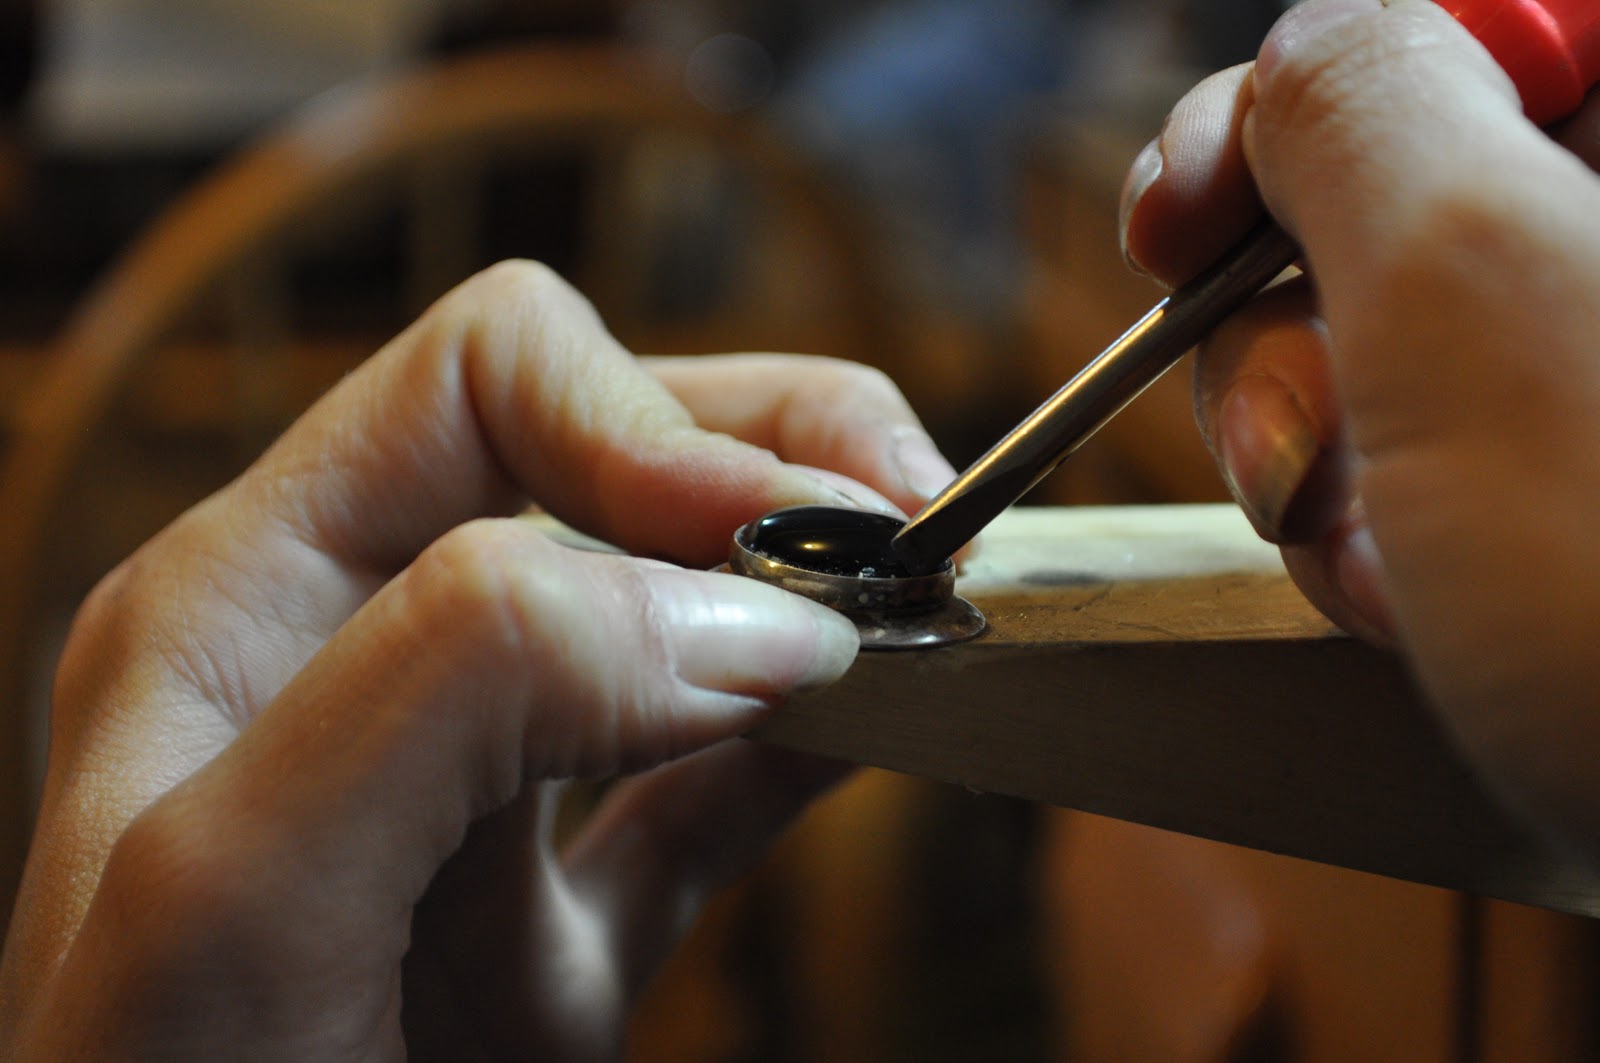
 The important part is the tool you use. I had modified this screwdriver years ago as a makeshift rivet starter....didn't work so well. But it work GREAT for opening up bezels.

 You see how I sharpened up the tip? One side is pretty flat while the other tapers into that side. The flat side should go next to the stone as you open up the bezel, that way you wont scratch your stone.
 So start by slipping the corner of your screwdriver in between the stone and the bezel. Again, your flat side is going to help you get super close to the stone and wedge the bezel open. Wiggle the screwdriver gently to get it to start opening up.
 Once you get it open a little, slip your screwdriver deeper into the bezel and at a 45 degree angle slide your tool along the inside of the bezel.
Viola! The bezel is open with no damage to the stone, and minimal damage to the bezel!

 Go ahead, pop out that stone and you are done! And all it took was 1 minute of careful work.
Man, that was kinda fun. Anyone have some bezels they need opened? Anyone?

Sunday, October 9, 2011

Ghost Rider

 Howdy! I've got a fun piece today! I found a lovely little agate from Montana over at Handleys. At first I was all ho hum, then I saw it: A cowboy riding through sage brush! So that what I did, and here's how.

First came designing the piece. Getting a decent cowboy silhouetteis one thing, getting it in the right proportion is another! It took me several tries, but i finally got my cowboy and horse the right size.

Next came making the piece. I switched over to a  new torch setup in the middle of making this. From acetylene/air with a big torch tip to oxy-propane with a MINI torch tip. Well, I had some trouble getting it hot enough to solder up right, but I kept trying and finally got it. yikes, though, what a nightmare!

So I got the bezel made and all ready to go, and drew on my little cowboy
  
 I cut him out

 I was careful in my sawing as I couldn't add metal if i screwed up! But he turned out okay
Now one thing i did take into consideration was the possibility of the back plate tarnishing. I am trying to mitigate that by creating a fine silver layer (using depletion guilting) under where the stone sits. We'll see...at the very least it makes the stone appear whiter.

 I set the agate in and it looks pretty darn good. One thing I didn't realize was the stone tapers off by a millimeter on one side! so to get it to fit into the piece I had to do a bit of resizing. Anyway, it looks pretty good. The camera didn't want to pick up on it, but you get the idea. he comes out pretty clearly in real life.

Tuesday, October 12, 2010

Creating Settings for Roman Coins

A long time ago I was asked by my mother to fix a pair of earrings. But because they had patinaed Roman coins bezel set in them, I decided to recreate the settings. I started off with this:
First thing to do was measure where I wanted the bezel, and where I wanted to open the backs.

After measuring I sawed out part of the silver disk to both lighten it and allow the backs of the coins to be seen. I then polished the disks lightly because I would be sautering the bezel on soon.

I created the bezels using fine silver, before sautering on the the disks i need to check that the coins fit.

Sautering.


Once I had everything attached  I had to polish. Polishing around the beads was difficult, but I got it. Finally, I set the coins and gave one last polish.

The final earrings are a little rough, and the beads do not match each other perfectly. But, the coins themselves don't match each other, and are rather rough. I wanted to give it that slightly imperfect look.