Showing posts with label ethiopian opal. Show all posts

Friday, June 24, 2011

Erikas Design Process

I make no claims to be a trained artist. Infact, most of my sense of design is purely instinct. When I work on a new piece i have several days of designing: sometimes i draw out the idea, sometimes i just move around the stonest themselves. I had a nice turquoise i wanted to pair with an opal, but i hade a bit of trouble figuring out what to do and how to so it. I did a small sketch, but it wasnt enough to fill in all the design holes. So I played with the stones i had until i saw something I liked. Here are three possibilities:
 I still like this one....

Ever so slightly different
But I went with this one. 

Now the question: where to I put the chain?

Tippy top?

Middle of the top?
Through the accent stones? IF i went with this design I would have to have the opal stationary-and my problem was I couldn't see how to connect the opal to the turquoise.
Finally, I decided to go through the top and connect the two stones with a rod....this also created lots of design possibilities. Big rod? Small one? Beads on the end? Gold or Silver? Though I almost went with gold accents out of nowhere i decided to use two rhodocrosite garnets.
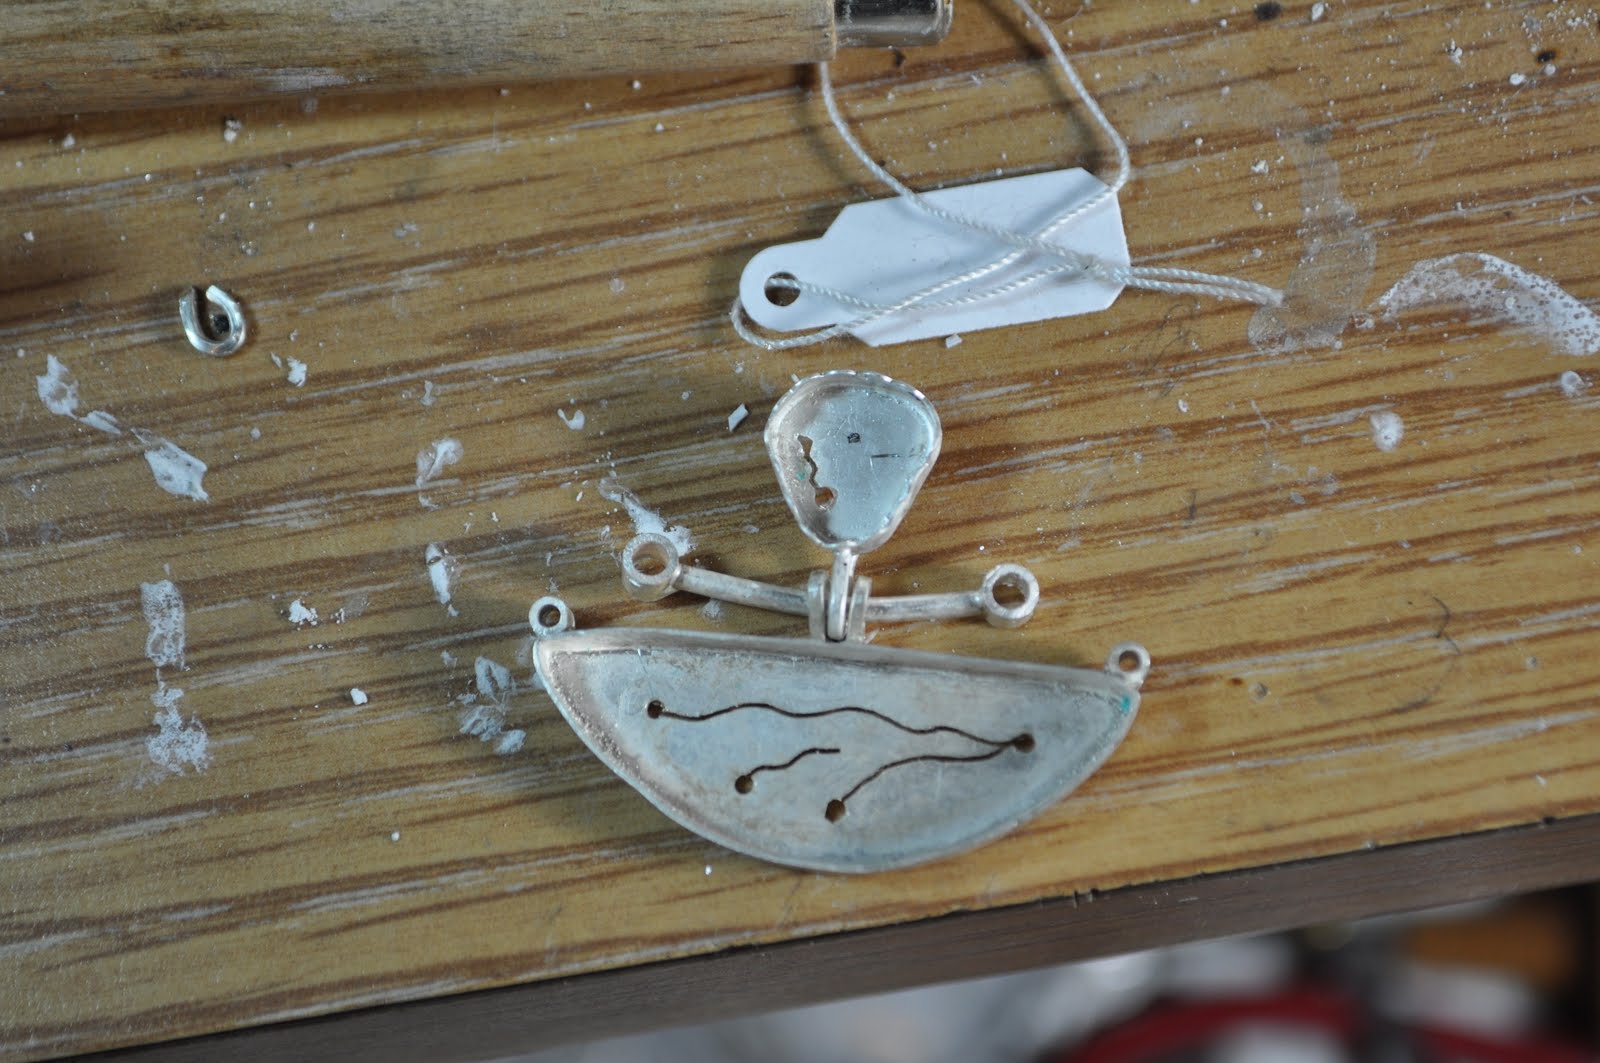

Here is the setting waiting for the stones.
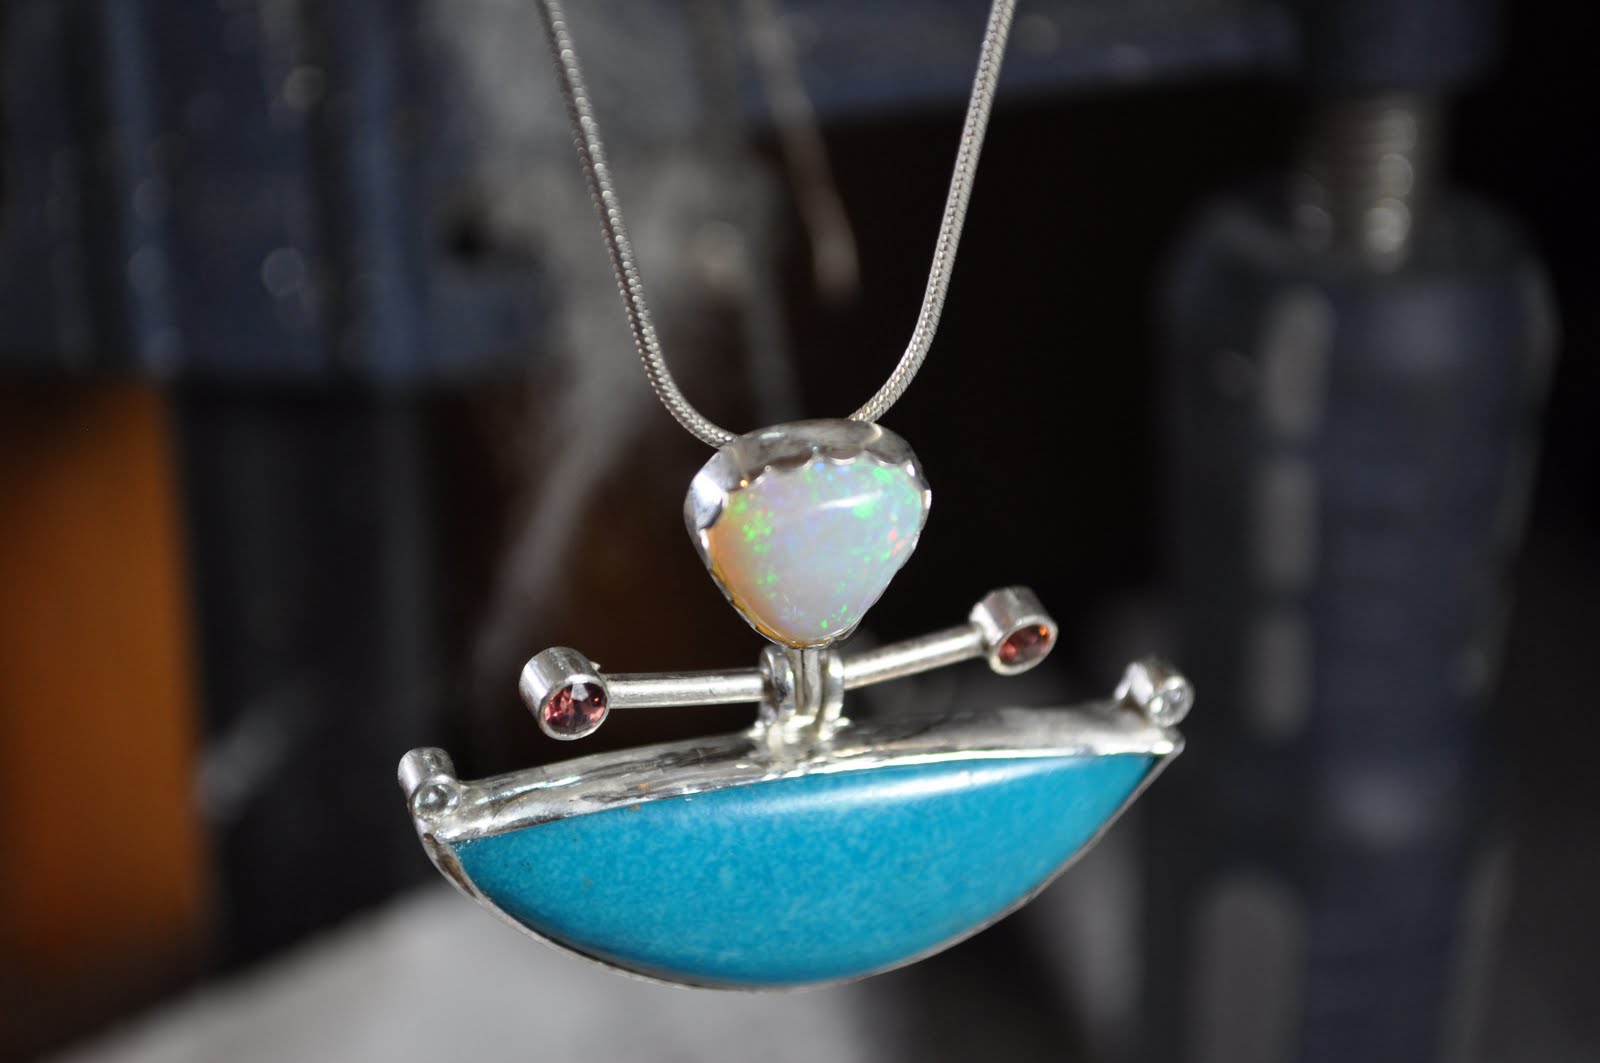

Finished piece. Well, almost, still needs a final polish but its not to bad for an afternoons work.

BTW This is the original piece of opal I cut that one from. I actually got THREE different pieces of jewelry from this one stone.

Monday, March 28, 2011

How to: Patina Silver at Home

I do not have liver of sulfer, the most common silver tarnishing compound. So when I read the other day that one can use over-boiled eggs to give a patina to silver, I had to try. First things first: you have to boil and egg until it starts to turn green inside. So, maybe 20-25 minutes rather than 15. All you need is the yolk, so give the whites to your niece who loves hard boiled eggs. Squish up the yolk and put it in a container with the silver and close it up.

After half an hour it was starting to tarnish a little. I dont thin i boiled my enough...plus the organic free range eggs arn't as sulfry as corprate eggs imho...

An hour later its changing color

The next morning its dark. I polished up what i wanted and the piece had nice details. If you ever find yourself in need of a silver patina but without your liver of sulfer this is a great, cheap eco-friendly way to do it.
I ended up having to solder the piece again and toss it in the pickle, which removed the patina. Oh well.
The finished piece. Again I used Ethiopian opal that I cut by hand and a paridot cab. A fun paisley ring.

Friday, January 28, 2011

Its Magic! (Actually, It's Just Science)

I dont know if you remeber me talking about hydrophane opal in my in my other post about opal, but I thought it might be fun to actually show you what happens. Check this out, its a cream colored opal, right?
Not a great picture of the fire, but its totally white. Well, for now anyway. I mentioned earlier that this kind of opal is very porous and will literally suck up water. Check out what happens when I put it in water for 3 minutes:


There goes the white color! Crazy, huh?

After five minutes for a piece this size it becomes completely clear: 


In some cases the fire will compeletly disappear, but if the fire is still visable an experienced cutter can take advantage of the transparent state of the opal to find the best way to cut the stone. Additionally, any cracks in the stone can be spotted before the stone is cut. Thus, offending material can be removed and a a more stable stone created.

oh, yes, and dont worry about my stone: it turned back to its regular color in about half an hour!

Thursday, January 27, 2011

Raw Opal Pendant


I am back! My poor computer has had so many pictures uploaded to it lately it was threatening to commit suicide. Scary.

Anyway, my other opal success has been a raw opal pendant I fabricated. While looking through the opal rough  saw two pieces of crystal opal that called out to me in their raw form. I listened to the opal and sliced the ends off the top crystal and got two nice little pieces. I needed a third piece so i took off the matrix on the middle rock and sliced it in half. What you see at the bottom is that same stone in two. The piece on the bottom right might be able to turn into a cab, but we will see about that later.


So I had my three stones still in their rough shape. At first I was planning on a bezel setting for them, but then I realized it would be well nigh impossible to get a smooth bezel around the stones with their odd, rough shapes. So I built baskets for each on out of wire. This meant creating a ring of wire to go around each stone, then sauder on four prongs.  After that I made the backing of the pendant and had to sauder all three baskets on the pendant without melting the baskets or accidently ruining the prongs. I did both. luckily the damage wasnt too back and i was able to fix both quickly. Once everything was saudered together I had to clean the piece and shine the whole thing. With so many nooks and crannies, it is a task. Finally, everything was ready for the opals to be set.

The end product:

Is it possible for rocks to feel organic?

This may be one of my favorite pieces to date. The fire in these three pieces is really great, that middle stone have a large area of red fire, while the top stone has more pin fire. I think I may be a fan of this Ethiopian opal. This particular opal is from an area called "Welo." Each of the areas mined in Ethiopia seem to have very disticnt characteristics. From   Keep an eye on the opal market, this stuff is pretty new but I suspect this is going the be pretty hot stuff in a few years. It will be interesting to see how stable it is: I have heard some saying it is as stable as Australian, and others saying it is completely unstable!

Right now the opal is mined by farmers, which means while the land isn't being torn up with big machines, few of the farmers have proper safety equiptment. There are a few people going to the mining areas teaching the farmers about mineing safety and providing hardhats tools. Hopefully the mining operations will remain small, but those opting to mine will be able to do so in a safe manner.


Where is your favorite opal from? Black opal from Austrailia? Fire opal from Mexico? Or do you like to keep it stateside with opal from Nevada?

More Opal-Just in Time for Valentines Day!

This weekend I made it to the gem show that was in town. I got two things that made me happy: rough opal and a strand of garnet nuggets. Not too much else to get excited about, though. So, opal: I spent maybe an hour and a half pawing through the rough opal. I only had $45 in cash i was allowing myself to spend, and i kept digging out great pieces of opal that would have cost half that. Oh, it was so hard to choose between all the pieces! I decided that for a beginner in cutting, more was better so I opted for cheaper pieces. This is what I walked away with (without spending all my money)


A couple pieces to work with. All but one piece came from Ethiopia. What is interesting about this opal is it is something called hydrophane opal. This sort of opal is particularly porus so it soaks up water and will even change color! White hydrophane opal will turn clear in water, and the pink opal from Mezezo turned deep brown! Some folks say that this sort of opal should be cut dry, which means you have to be extra careful about heat. I tried it both with water and without. Both ways have their advantages and disadvantages.

 The first stone I tried to shape was this Mezezo opal. It had a strange shape with pits and cleaves, but it was enough of a heart shape I decided to cut it that way so as not to loose too much material. In the photograph of the rough stone you can see that dark dot: that was a drop of water that turned it dark!

I think it came out pretty good-although its a pretty thick piece so I fear it would be difficult to set. As I polished the piece I kept it  in my fingers rather than a dop stick so I could  gauge the tempature. I cut this piece without water, so overheating was a real danger. The heat seemed to sink to the center of the stone, so I didn't even notice until I started getting puckering on the backside! Oh no!  I had to go back and smooth out the back again. I finally decided to use just a little water to help with the heat, not much but enough to keep it a little cool. It is hard to do, though, because this sort of opal literally sucks up water!

 I am not one for hearts, but this is a pretty cute little stone. I was so proud of myself for cutting it I walked around with it a few days. :) The fire that this opal has is pretty impressive, the pictures do not do it justice! This would make a pretty sweet V-day gift for a rockhound or an opal lover.

I'll be back with more on my opals soon.