Showing posts with label sapphire. Show all posts

Friday, February 25, 2011

It Stoned Me to My Soul

In keeping with the Aspiring Metalsmiths blogroll I'm going to post my stone collection. After going through this I realize I don't have all that many and really ought to start buying more. dear me dear me! Lets start with one I've been sitting on for almost two years:
This is a huge amethyst. I cant count how many times i've carved a basket out of wax for this piece. Once as i was finishing up on a beautiful basket I dropped the wax and STEPPED on it! I was about to sprue it up...alas, it has, mishap after mishap, remained unset. Hopefully soon. Next

One of two ammonite slices. Its mate is still waiting for the setting to come together and be set. I have a grand idea for this piece, just need some pitch and a sandbag.

This is an interesting aquamarine. I had trouble getting a good shot of it, but the cut spirals to the center. Its such a unique stone I'm waiting until the right idea comes along.

These are my lovely garnets. Their setting is waiting to be finished...My design was beyond my skill level, so now it sit waiting to be perfected. A set of gravers would help immensely

These are some of the few beads i like. Garnet nuggets like the ones I used for this piece. The feel so good between your fingers. Maybe I'll do something else with them soon.

Opals in the process of being cut. Need 600 mesh diamond, then the final polish.

A pale morganite and tanzinites. Some of my first stones.
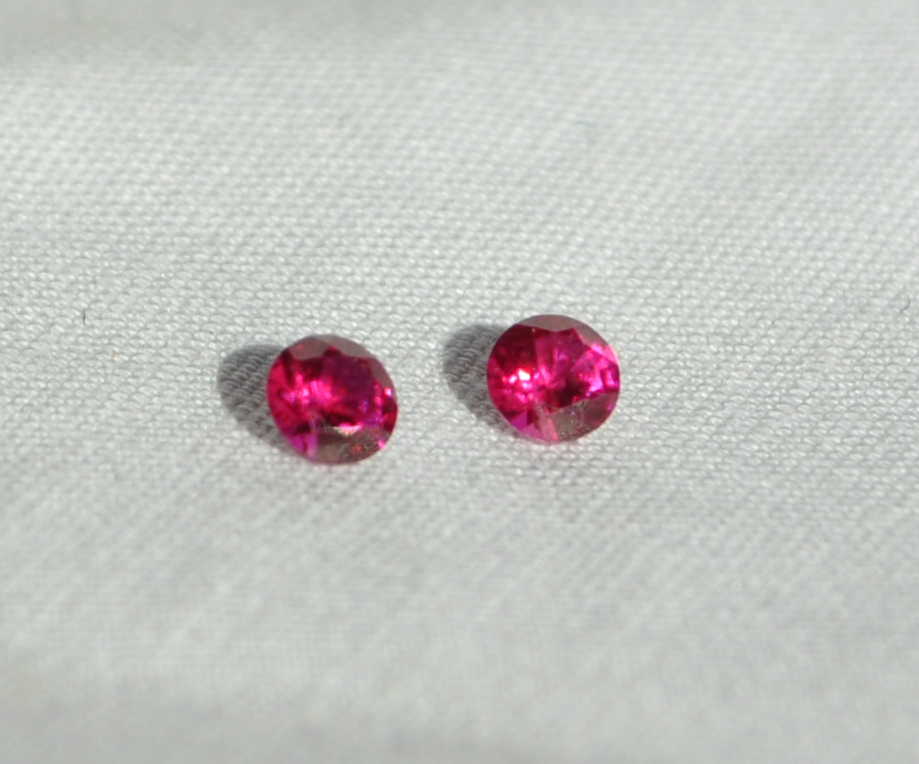
Two lovely rubies. sometimes I just sit and stare at this pair.
A recent aquisition. Montana sapphire with interesting cut.


My collection of yellow sapphires. Some have a very nice quality, other are so-so.

The rest of my sapphire collection. I do like sapphires because of their strength and many colors.

Turquoise and opal, these are meant to be together. Waiting for the third stone to appear.
Well, I have my eye on a few stones at a few shops, and a few more pieces i had trouble scrounging up.  Lots of pearls too, but my computer refuses to let me upload them. I have a few up here. Plus the jar of beach rocks and agates i have which deserve a page unto themselves! hum...maybe i'll go do something with those right now...

Dont forget to check out the other stoner collections from the Aspiring Metalsmiths team

Thursday, February 17, 2011

How To: Make a Set of Rings

Hello everyone! I feel like sharing a tutorial with everyone today: how to make several rings at once from wire. I used this technique to create my Stacking rabbit ring. I am using 18 gauge square wire, but you can do this with most any wire. You can make a single ring by measuring out the needed length of wire, fileing the ends, and bending so the two ends meet. Or, you can use a mandrel. My wire is soft enough i can just bend it around the mandrel

 Dont forget to use soft wire or anneal your stock before doing this!
 If the wire is too this for thick for bending, use the rawhide mattle. Strike the metal next to the mandrel-not on it. Tap the wire around the mandrel. Its best to have the mandrel in a bench vise, but it works if you prop your mardrel against something sturdy. Just be careful about leaving knicks in it, i always cushion mine with a rag.
You should have a section of wire that has been wrapped at least once around the mandrel, I wrapped mine around three times. Take that section of wire and saw it right down the middle of all the rings.

When you've sawed through you should have several identical rings

If you need to, file the edged so they are flush with eachother
Hold the rings up to the light: see how one of these rings hardly has any space between the edgrs, and the bottom has lots of light coming through? (You may need to click it to see the bigger picture) The lower one will not sauder well, the top one is ready to go!
So, you ready for the torch? Bs sure to flux the metal, I use brush on flux paste, but there are lots of options out there. Next, add the sauder chips.
Try to start with hard suader: it is the strongest and if you have more pieces to sauder on, you dont want it to accidently flow and come undone while you are working on another section. Start off with hard and do as much as you can with hard before moving the medium. Many jewelrs avoid ever using easy, but sometimes you have to. Just remember: it is soft and weaker, dont use it for something that will get lots of strain.
Dont forget to flux the chip, too, or they will oxidize on the outside and refuse to flow!
Turn up the heat! Gently heat up the rings to burn off the water in the flux. If you heat too quickly it will bubbly and possibly toss aside your sauder chip. Once youve got the flux dry, heat the piece. You have two ways of telling when the sauder will flow: When the color of the piece starts to turn a a LIGHT red, hit the area with the sauder with the flame. Or, with paste flux when it moves from gross sticky brown to clear you should be ready to flow. Sauder flows to where it is hot and it doesnt jump gaps, so make sure your ring is nice and hot on both sides of the joint.
Let your pieces cool before going into the pickle pot. I have a bit of a odd set-up: I have a block of marble under a saudering board with a charcol block on top. Nope, it doesnt spin, dont have pumice, or a screen....or alot of things. I'm makeshift.
Drop them in the pickle pot, and you've got yourself some rings!
And, but wait, they are kinda a wonky shape, eh?  Wake out your mandrel again and lightly tap the rings down the mandrel with a rawhide mallet.

This same technique can be used to size the rings, if one is a little too small you can stretch it out by gently hammering it down the mandrel. Once you have your rings round and the right size, file off the extra sauder from the joints.
Once thats done, it is time to start polishing. One effective way is with sandpaper on a flat stick. Start with the roughest you need. This was a pretty clean piece, so I started with 400 grit.

From there I went to 600, straight to tripoli compund then fabuluster. be careful if you use polishing compounds on wheels: do not let your tripoli get on anything with a higher grit. It will contaminate the wheel or whatever. When you switch to a higher grit polishing compound wash the piece AND your hands clean so as not to contaminate. If you buffs or even your compound is contaminatd you will not be able to get that higher polish.

Also, use a breakaway grip. That means if your wheel catches your item, it wont take your fingers with it. Below is the three rings with varying degrees of polish.

From here you can do alot, plain stackable rings or hammer them on the mandrel to get texture without ruining the shap. I personally added stones. The finished product from these three rings:

Oh, you know you want to buy it. ;)

Everyone has their own special way of doing things. Anyone else have techniques to add?