I finally learned pave, yay! or at least this basic pattern. The pattern will change depending on the shape and there is a whole theory behind how to arrange the prong pattern which i haven't yet been able to comprehend, so lets just stick with the simple triangle, eh?
First set your stones table down on the piece almost touching, then mark their centers. Drill your starter holes
These came out a little close, so I put the stones in to see it would work, yeah, it will.
See how the stones are almost, nearly touching? That is what you want.
So now mark one side as top, and drill out the seat for the stone at the top. This will be your guide stone. make sure to drill deep enough when you put your stone it its table is flush (or just slightly lower) with the metal.
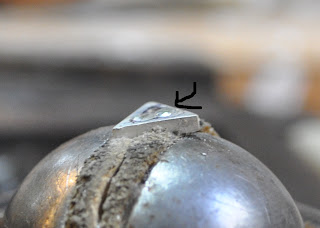
Drill your next seat a hairs width from the other seat. You want the smallest gap you can make between the stones without them actually touching. That is the hard part. Sometimes i drill close enough I have a sliver of metal that moves between the hole depending on which side i drill: this is a good sign to me.Next drill out your third seat now only a hairs width from both of the other stones. That was hard, eh? Now take your tiny oval graver and cut out any wall material between your stones, be sure to leave the stub in the middle of the three stones. You can see what i mean by expanding the picture below: I tried to mark the metal I wanted to keep with a sharpie. You may need to touch up your seats again with your drill to get out any flashing.
Now when you fit your stones in they should all be almost touching, tables flush with the surface and sitting straight. Not too much to ask.
as you can see in this picture one of my stones is sitting up too high so i had to pop it out and drill the hole a little deeper.
Once you get everything even its time to start setting. Take your knife graver now, put the tip into the metal at a 30 degree angle, then lift your graver up to a 70 degree angle and push into the metal wiggling side to side. this will make the metal mushroom over the stone and should only leave a dent in the metal. This is the beginning of your bead. This alone should set your stone, after you have all the corners done your stones should be set and the rest is cosmetic. In this piece there are 6 beads you want to create: the 3 corners, and the 3 pieces on metal between the stones.
Once you have created 6 beads now you need to set them free. Start with your knife graver and cut a little V shape around your bead. This should leave you with enough metal for a round bead prong. You can sort of see in the picture below how I started cutting away the metal. Do that with all the beads, then take a beading tool and burnish your little metal nubs into actual beads. The arrows below show which direction your prongs should go. Each stone gets a single prong in the corner, and the metal between the stones create shared prongs. Using your round gravers face you can tilt that center bead to hold the two lower stones, or if you have enough metal you can create a shared prong between all three stones.
Clean up the edges using a flat graver creating a bright cut around the edges. Add milligrain if you want, polish it up and there you go! A basic pavé!


